

The Basic version of Asset Cloud allows the creation of up to 5 notifications. The Complete versions allow unlimited notifications.
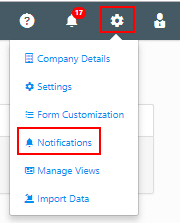
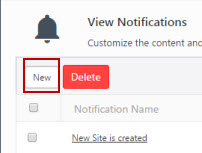
Notifications are reminders or alerts about upcoming due dates, transactions, events, etc. These are created by users with Administrator privileges and can be set to appear on all or specified user accounts. Notifications can be set to be emailed to specific users and/or to appear in the Notifications section of Asset Cloud.
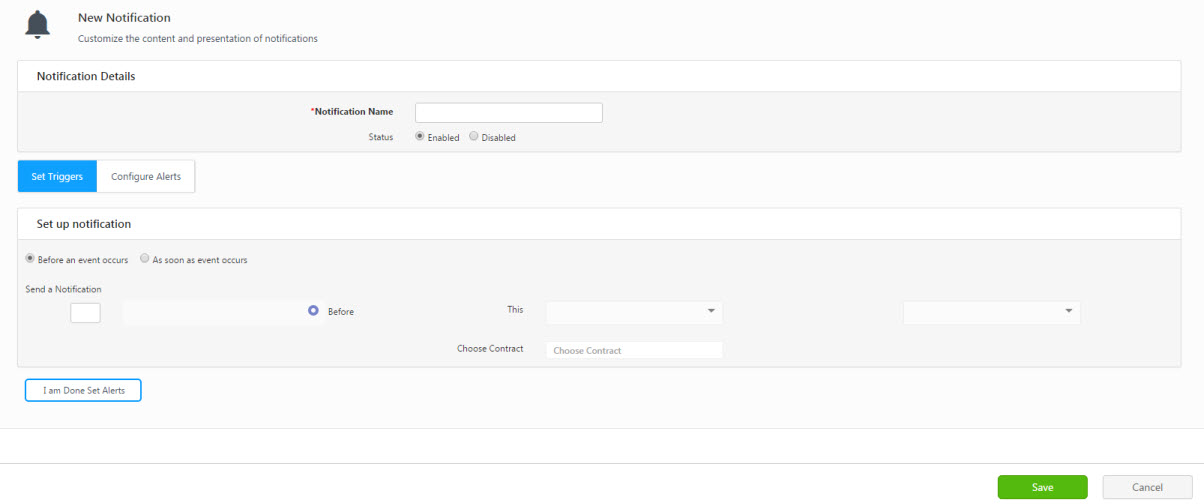
Click on the Before an event occurs radio button.
 Send a Notification
Enter the number in the empty box. This field shows the number of hours/days/weeks/months.
Select hours/days/weeks/months from the drop-down list.
Select contract/ funding/ asset/ audit window/ maintenance/ purchase order/ a specific purchase order in the "This" field.
Choose the name of the contract/ funding/ asset/ audit window/ maintenance task/ purchase order.
Click on the "I am Done Set Alerts" button. The screen will navigate to Configure Alerts screen.
Click on the As soon as event occurs radio button.

Select - any asset/ a specific asset/ a specific asset type/ any site/ any location/ any vendor/ any customer/ any employee/ any import/any full sync import/ any asset type/ any manufacturer/ any purchase order in the When field.
Select No Filter/ Asset Type/ Funding / Maintenance.
Select - past due/ move/ checkout to/ checkout/ checkout at/ past due at/ check in by/ check in/ check in at/ dispose/ recover/ created/ purchased/end of life/ updated /close Incomplete/ close completed /complete/ deleted/ closed in the Is field.
Enter the Asset / Funding Name / Asset type name.
Enter notes, if any.
Click on the I am Done Set Alerts button. The screen will navigate to Configure Alerts screen.
Click on the Email / Web Browser checkbox. You can select both checkboxes.
Note: All the recipients will receive an email if you select an email notification. For the web browser, the notification will appear below the bell icon when the specified user logs in to the application.
Click on the Preview link for Report View.
Click on the Template button to update the template format. You can edit the wording of the alert too.

Click the Send to myself / Assignee / Assignee's Manager checkbox. You can select all three checkboxes. Note: Some notifications, like a Check Out Notification, will show additional checkboxes for the Assignee and Assignee Manager.

Send to Users - Select the users for sending the notification updates by clicking on the checkbox(s). You can also select all the users by clicking on the checkbox next to the User Name field.
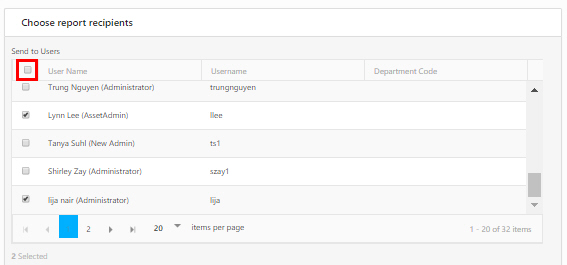
Send to Roles - Select the roles for sending the notification updates by clicking on the checkbox(s). You can also select all the users by clicking on the checkbox next to the Role field.
Send to these e-mail addresses - Enter the e-mail addresses.


FAQs - Refer to Knowledgebase - Knowledgebase > Cloud > AssetCloud for FAQs. Example: How to edit the contents of a notification email?
Note: Use of the resources described here requires internet access.